
So your organisation has acquired an ASN Number and the IP Address Space or is seriously thinking about it.
But you are not sure what are the next steps to ensure the global visibility of your ASN and IPs in BGP?
We regularly get these questions from our clients, so we understand how frustrating and confusing this subject can be at first.
In this guide, we are going to be focusing on the RIPE (registry) side configuration, rather than the BGP router setup, that hopefully, your network team have under control. However, if you need help with your router setup, we offer a reasonably priced BGP implementation service. Contact us for details.
We’ve prepared this actionable guide to show you precisely what needs doing to get you up and running quickly.
We are also going to be introducing some tools to help you validate the results, and as a bonus, we’ve prepared a downloadable checklist so that you can keep yourself organised as you read this guide.
Sign up for an IP Transit
First of all, for your organisation to announce a BGP route, you need an upstream provider to establish a BGP session and exchange routes.
The upstream provider could be an ISP or a hosting company where you host your servers.
As part of the service often called the “IP Transit”, they will provide you with a BGP session.
However, this guide is not going to attempt to make a recommendation on upstream providers as these vary from country to county, and it is impossible to cover all the options available to you.
If your organisation already holds an ASN number, then hopefully your upstream providers are already decided. Otherwise, you are encouraged to do your research separately.
As you are going to learn, sooner or later, your upstream providers employ some kind of a route filtering, on the BGP session with you. They do this to ensure that you only announce them the networks registered to your organisation.
This practice is to protect the rest of the internet from what is technically known as a “route leak“. And it happens when a network operator advertises a route of another network operator that they are not authorised to advertise, and hijack the traffic destined for that network.
Now, with this introduction out of the way, let’s focus on the actual steps for you to follow.
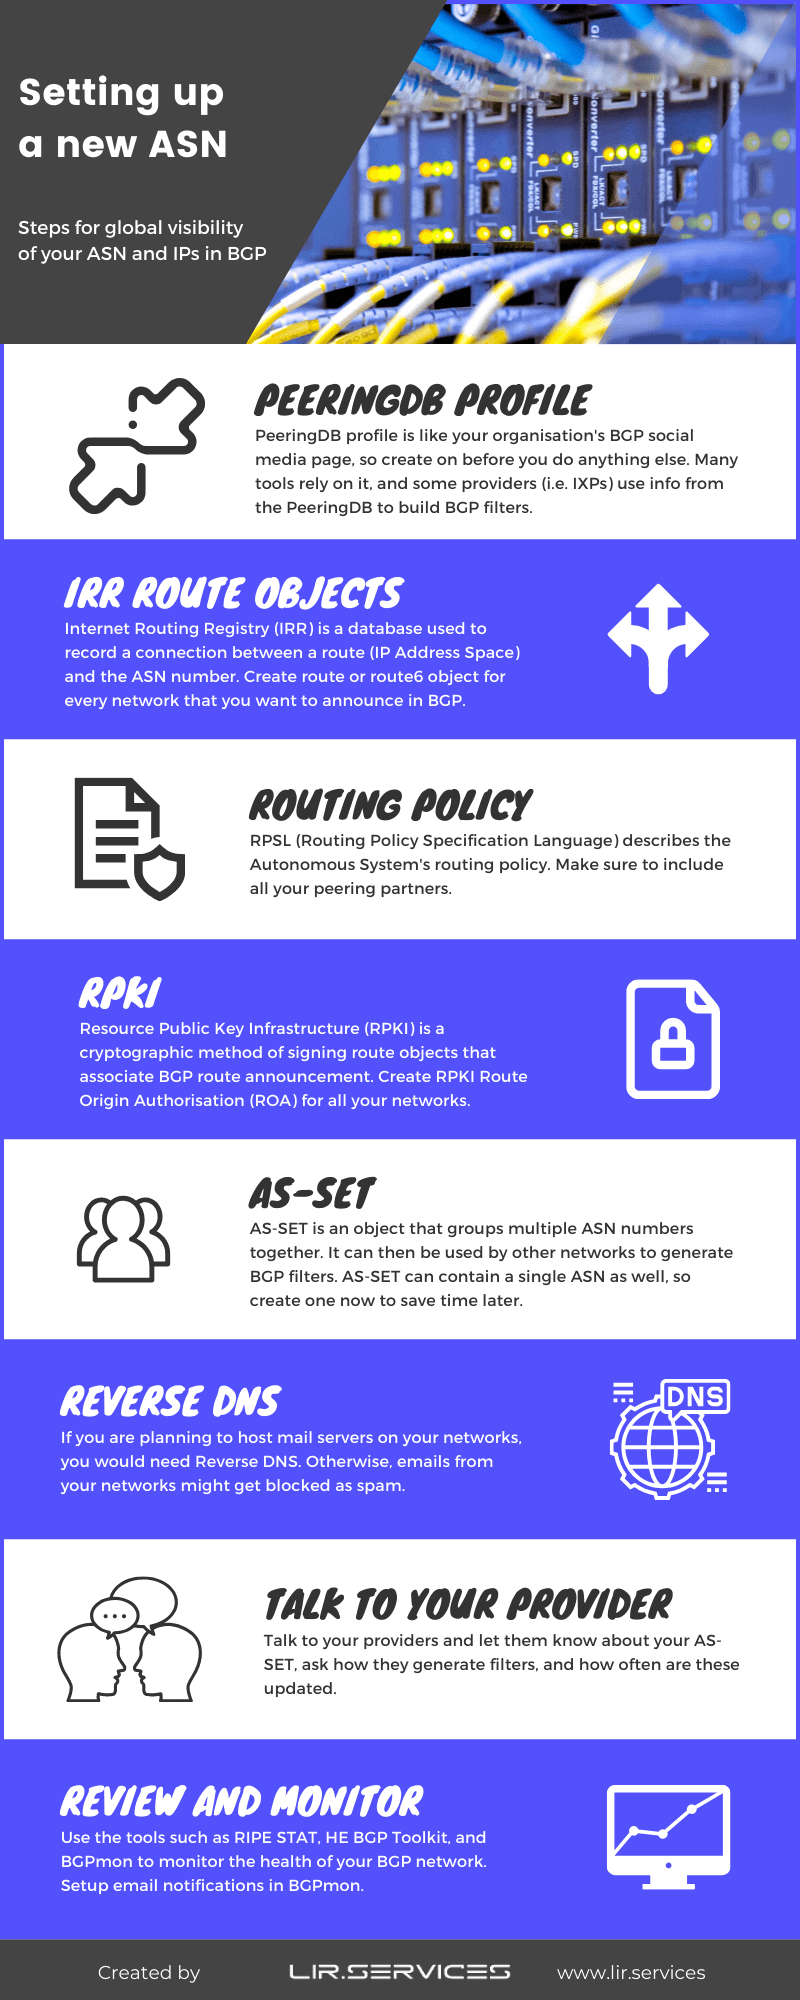
Create a PeeringDB profile
Quoting directly from PeeringDB’s website:
PeeringDB is a freely available, user-maintained, database of networks, and the go-to location for interconnection data. The database facilitates the global interconnection of networks at Internet Exchange Points (IXPs), data centers, and other interconnection facilities, and is the first stop in making interconnection decisions.
So, seriously before you do anything else, you should create a PeeringDB profile for your organisation.
Some of the tools that we are going to be introducing later depend on your organisations having a PeeringDB profile, to display proper information. Also, if you are thinking of peering on an Internet Exchange, then PeeringDB is a must.
While the process is pretty straight forward, it requires manual verification, to link your ASN to your PeeringDB account. So, please make sure that your email address is correct in the RIPE whois database before you proceed.
The point worth mentioning is that you will come across the option for specifying route prefix-limit. Some providers use these on their BGP sessions to limit how many prefixes you can advertise to them before disabling the BGP session. This is yet another layer of protection against the route leaks.
Our advice here is to start with something like 25 even if you are announcing just a single route. The reason for this is that you are likely to quickly forget that you’ve set this up and it has the potential to cause issues later.
Create IRR route objects
Internet Routing Registry (IRR) is a database used to record a connection between a route (IP Address Space) and the originating ASN number.
At the time of writing of this blog post, all the Regional Internet Registries (RIRs) except for LACNIC, so namely RIPE, APNIC, AFRINIC, and ARIN run their IRR databases.
These databases are available to their respective resources holders only. So, too put this in perspective, as an example, RIPE routes can be registered in RIPE IRR (part of RIPE WHOIS), but not in APNIC IRR.
As previously mentioned, LACNIC does not have its own IRR database, and its resource holders should be registering their routes in one of the following third-party IRRs:
- RADb (commercial)
- NTTCOM (available to NTT clients only)
- ALTDB (free, but takes time for new maintainers to be approved)
Additionally, these third-party databases accept routes from all RIRs, so it would be acceptable to register RIPE routes in RADb as an example.
However, you should use a local RIR’s IRR database as much as possible for the best results, as some network providers ignore one or more of these third party databases.
The route objects in the RIPE whois look like this:
route for IPv4
route: 185.88.213.0/24
descr: LIR SERVICES
origin: AS17818
route6 for IPv6
route6: 2a0a:6500::/48
descr: LIR SERVICES
origin: AS17818
So, route and route6 attributes describe the network address for IPv4 or IPv6, respectively, and the origin describes the originating ASN.
The descr attribute isn’t displayed on the object creation screen by default, and you got to add it from the dropdown when creating the object. The reason for adding the descr attributes is that it is used as a network name by some tools (such as the HE BGP Toolkit) that we are introducing later.
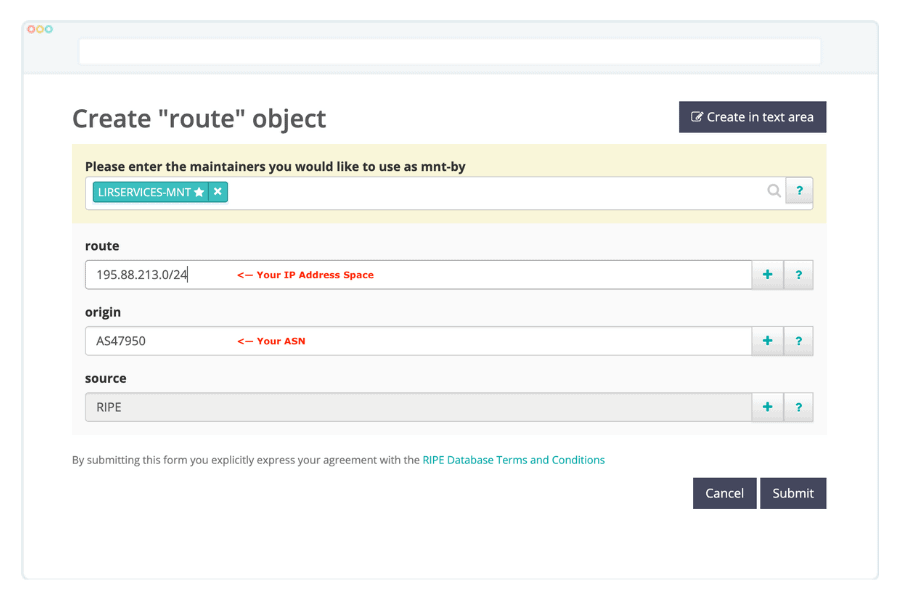
To create the route objects follow these direct links to the RIPE whois database. You would need to login to your RIPE account.
create a route object for IPv4
create a route6 object for IPv6
And populate the form as in the example below:
Check and update your Routing Policy statements
The import and export statements describe your Autonomous Systems routing policy. These are written in the RPSL (Routing Policy Specification Language), which is defined in RFC4012. While not a common practice anymore, some network providers may still rely on these to create their BGP filters and authenticate peering relationships.
We suggest that you create and keep these up to date.
If your organisation already has an ASN, you would remember that as part of your original ASN registration, you have provided details of two peering partners (usually upstream providers). RIPE then had used this information to create the routing policy statements that may look like this:
import: from AS47950 accept ANY
export: to AS47950 announce AS17818
While the above statements relate to IPv4 only, some network providers for simplicity build both IPv4 and IPv6 filters based on these statements. However, this isn’t always the case, so we also recommend creating mp-import and mp-export that were specifically introduced to support both IPv4 and IPv6 protocols.
The final example would look like this:
import: from AS47950 accept ANY
export: to AS47950 announce AS17818
mp-import: afi ipv6.unicast from AS47950 accept ANY
mp-export: afi ipv6.unicast to AS47950 announce AS17818
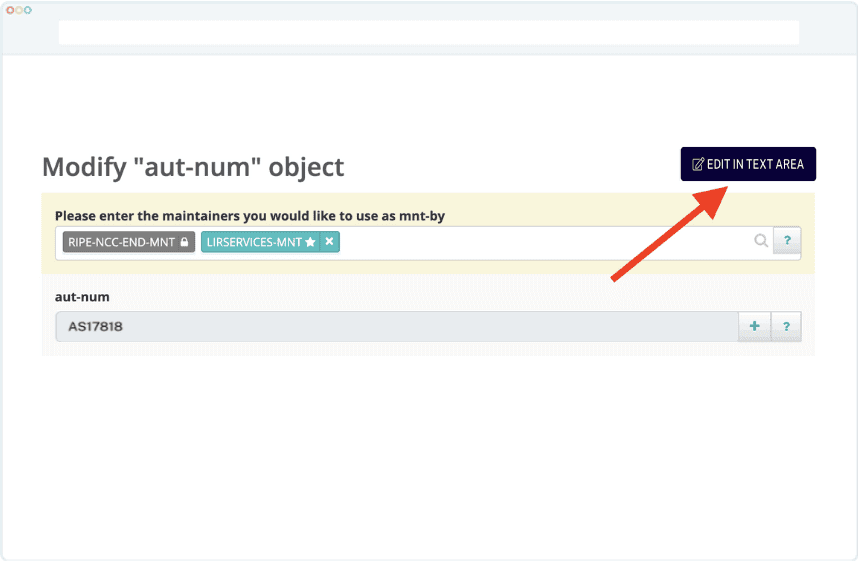
For you to update these, you would need to edit your ASN (aut-num) entry in RIPE.
To do this, go to the RIPE Whois, search for your ASN, and click on the “update” button.
For simplicity, we suggest that you do this update in the “text area” mode.
Resource Public Key Infrastructure (RPKI) is a cryptographic method of signing route objects that associate BGP route announcement with originating ASN number. RPKI is defined in the RFC6480.
The RPKI was created to work around some limits of IRR, which does not validate the origin ASN of the announcement, technically allowing a network to announce somebody else’s IP blocks.
To create an RPKI Route Origin Authorisation (ROA), you would navigate to the RPKI Dashboard.
Please note, however, that this option is available to PI (Provider Independent) resource holders only. If you are leasing you IPs from a provider such as LIR SERVICES, you would need to ask your provider to create the ROAs. We automatically create these for all our clients.
Create an AS-SET
This step is entirely optional, so feel free to skip it if it doesn’t apply to you.
AS-SET is an object that groups multiple ASN numbers together. It can then be used by other networks (i.e. upstream providers) to generate BGP filters, to allow routes from multiple ASNs on a single BGP session.
It is going to be super handy if your organisation decides to provide IP Transit as a service to clients at a later date or partner with another network to provide a backup connection for each other.
Whatever your plans are, our opinion is that it is still worth creating an AS-SET with just a single ASN, as it can save you quite a bit of time in the future on contacting your upstream providers to request this change.
If you decide that AS-SET is right for you, please remember to update your Routing Policy created in one of the previous steps to reflect this.
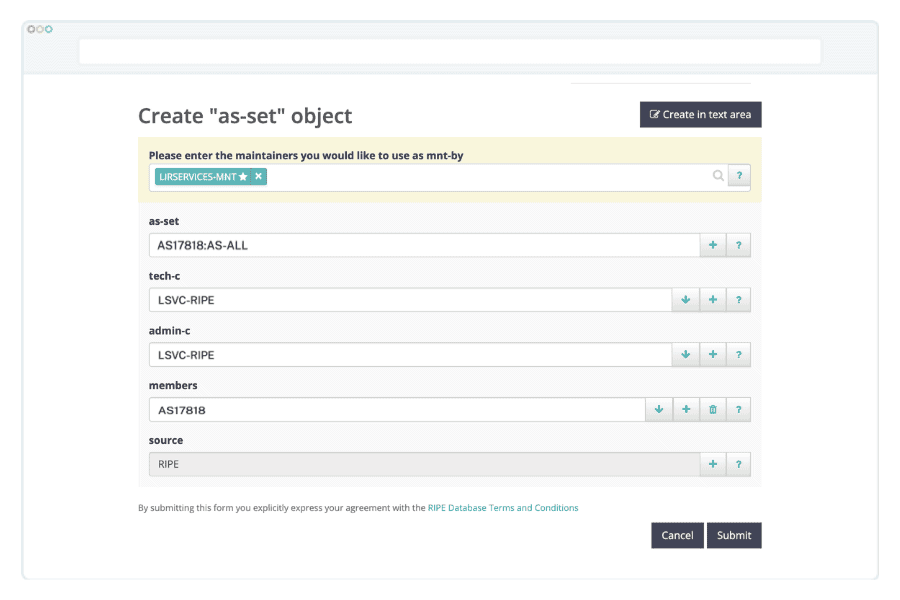
Note: Starting in 2023, it is no longer possible to create non-hierarchical (i.e., AS-MYCOMPANY) AS-SETs in the RIPE database. This is to prevent potential crashes between different IRR databases. You would need to create a hierarchical AS-SET, such as AS17818:AS-MYCOMPANY, instead.
You will use the AS-SET name (our’s is AS17818:AS-ALL) instead of your ASN number on the export filters, like in the following example:
export: to AS47950 announce AS17818:AS-ALL
mp-export: afi ipv6.unicast to AS47950 announce AS17818:AS-ALL
To create an AS-SET use the following direct link:
creating an AS-SET in RIPE whois
Please note that you would need to add the members attribute from the dropdown manually as it isn’t displayed by default.
Configure Reverse DNS
You may also want to set up the reverse DNS records for your networks. These will be necessary if you plan to host mail servers.
RIPE validates DNS servers configuration as part of the setup process, so you would need to meet some specific conditions. These are, quoting directly from RIPE’s website:
- Make sure you set up at least two name servers that are authoritative for the zone.
- Ensure that the servers are at least in different subnets, but preferably in different networks that are geographically distributed.
- The resolvable names of these name servers should be in the NS resource records of the zone.
- The SOA resource record (RR) should have the same content, both serial number and other data, on all the nameservers.
- The SOA should contain a valid ‘RNAME’ (the contact address).
- The timing parameters should be reasonable.
The reverse DNS is controlled by the domain object in RIPE whois.
If your organisation does not host own DNS servers, or if your DNS provider does not support reverse DNS zones, we can provide hosted Reverse DNS for an annual fee of 60 EUR per IP Block. Our hosted Reverse DNS comes with an admin panel to manage the revdns zone. If this is of interest, get in touch today.
Talk to your upstream providers
That’s it! We’ve covered all the technical steps, and it is the time to talk to your upstream providers and ask some questions. And optionally let them know what your AS-SET is.
We suggest that you download our FREE ASN checklist before you talk to your providers as it will help you formulate the right questions and record the answers.
The questions that you should ask:
- Do you build BGP filters automatically or manually?
- If automatically, how often do you update the filters?
- If manually, can you build them based on the AS-SET, or you need a list of prefixes? How often do you make manual changes?
- Do you enforce any prefix limits on the BGP sessions? How is it updated, and what is our current limit? Ask if updating it automatically from the PeeringDB is possible.
These should hopefully cover the most common scenarios, but if you find something else worth mentioning here, that comes up in discussion with your provider, please let us know so that we could update this guide.
Validate your annoucements
So now that you followed all these steps, it would be helpful to validate that your announcements are working as expected. For this, we are introducing a few tools.
However, please bear in mind that most of these tools aren’t real-time so it may take a few hours to a few days for these to pick up your announcements.
RIPE Stat – RIPE’s own statistical tool; contains some handy functions, such as Routing Status and Visibility. Just search for your own ASN. Data is updated a few times a day.
Hurricane Electric’s BGP Toolkit – Our go-to tool for general informaion on any given ASN. Displays peering information and network prefixes advertised. Updated daily, but may take a few days to show up initially.
PeeringDB – A database of networks and their interconnections. Ideal for finding facilities where a given network is present. You’ve hopefully listened to us and created a profile for your ASN by now!
BGPmon – a tool used to monitor your BGP prefixes, and send email notifications on unusual events such as prefix hijack, change of AS path, or a transit provider. It can also monitor RPKI ROA status.
Looking Glass – these can help you validate if your routes are being properly seen by various networks in real-time, however, the output might be a little bit difficult to read at first. Google your upstream provider’s name + “looking glass”, and give it a go.
Conclusion
Thanks to this guide, you’ve got everything that you need to get started in one place, and it hopefully saves you some time, and you found it useful.
Before you start implementing these steps, make sure to share this guide on your favourite social media.
Now that your IPs are visible in BGP you may also want to read our Network Administrator’s Guide to IP Geolocation to ensure that their location is recognised properly.
Oh, and remember to download our free ASN checklist.